http://sunshine--days.blogspot.co.uk/search/label/craftsHTML Map
Showing posts with label DIY. Show all posts

Thursday, 19 June 2014

I'm a little too young with not enough time

During my laptop free life, I made possibly the easiest, tastiest treats ever known to man and it caused me a lot of sadness to know I couldn't instantly share the joy with all of you chocoholics out there. Fear not, because I've been saving up all of my excitement about these beauties for all this time ready to post about once I had a working laptop at my fingertips. 


I'm talking about Oreo chocolate truffles. Three ingredients, no baking, no fuss, what more could you ever need in life? 

To make these beautiful little things, all you need is:

two 154g packets of oreos (I used the ones with chocolate creme just to add a bit of extra chocolatey goodness)
1 tub of Chocolate philadelphia (they work just as well with just ordinary cream cheese but once again I decided a bit of extra chocolate wouldn't go amiss)
150g milk chocolate

To start, put the oreos in a plastic bag (or whizz them in a food processor if you're fancier than I am) and take out your frustrations on the biscuits with a rolling pin until the oreos are ground into fine crumbs. 
Pour the ground up oreos into a bowl with the cream cheese and mix together until it is all combined. 

Take a small amount of the mixture and roll into a ball. Repeat this until you have used up all of the mixture. 

Put the balls into the fridge for 30 minutes or so. 

Just before you remove the balls from the fridge, melt your chocolate in a heat proof bowl over a saucepan of water or in the microwave.

You've got a few options at this point. You could easily add lollipop sticks to the balls to turn them into cake pops as this will make the coating a bit more even all over or just leave them as I did and hope that the lucky recipients of these treats are too busy enjoying the taste to notice the imperfect presentation. 
Coat each ball in chocolate and then put back into the fridge for about 30 mins until the chocolate has set. 

Remove from the fridge about 10 minutes before serving, you could even go crazy and cover them in glitter like I did (yes, I was hoping the glitter would hide the parts where the chocolate coating had come off!)


See what I mean about them being easy to make? You'd be crazy not to give them a go! 


Tuesday, 19 February 2013

Don't throw your fortune away

I arrived home after work today to the most lovely treat ever. I found out at the weekend that I'd won Linda from Hey! Homewrecker's Love Birds giveaway and today was the day that the little parcel dropped through my letterbox. Linda is the queen of all things crafty and this little Love Birds picture is just too gorgeous (as soon as I'd torn through the paper I was straight in there knocking a nail into the wall for it to hang on opposite my bed). Check out her blog, its full of incredible crafty bits and bobs and beautiful colours and fabrics. Plus, as if the parcel wasn't amazing enough enough already, she also included a note inside the cutest illustrated card too (made by her sister), how perfect are those foxes?! AMAZING! 


And onto another crafty lady, my buddy Charlie made me this pretty lining for a basket that I bought a few weeks ago. It originally came with a blue and white gingham lining which reminded me a little too much of my old primary school summer dress, so we marched down to the market to pick something a bit less uniform and a bit more Kaz friendly. That's where my input into the basket ended... I have absolutely no sewing skills whatsoever. I used to sneak my textiles work home for my Mum to add to every week and then sit there pretending to thread needles every week in lessons (actually... I probably didn't need to pretend, it takes me about an hour to thread one anyway!). Luckily, Charlie's a lot better with a sewing machine than I am so happily stepped in to make this for me. Now I have a pretty place to store my hairdryer, make up bags, and a frisbee (not quite sure how that ended up in there). 

Lucky for me, there was just enough fabric left over for me to pretend to be good at making things too. I'd bought a frame on mine and Michelle's unromantic Valentine's day in Ikea last week and decided I could turn it into something fun. And voila, one frame (made in much the same way as the noticeboard we made a few weeks ago), lots of buttons and a lot of superglue later, this creation was formed. I'm a bit too haphazard and DIY inept to keep up with Linda and Charlie's work, but I did myself proud here. Even if the heart is a bit wonky and uneven if you look at it too closely. 


Wednesday, 6 February 2013

Take me, take me, home, home

My flatmate and I finally decided last week to finally get round to putting up some sort of decoration in the living area. About time really as we've been living here for 7 months or so now. And so, after talking about it and talking about it for months on end, we took a trip to Dunelm for the final bits we needed to make a noticeboard for photos, shopping lists and all the other knick knacks that accumulate over time. 

I really don't know what took us so long, this pretty little noticeboard was so simple to make and has made such a difference to brightening up our big bare wall. If I didn't have so much other stuff up on my bedroom walls already I'd be making myself another... I say this, but I can guarantee I'll get bored in a few weeks and end up hammering a load more holes into my walls so I can have one of these beauties by my bed too. If you're looking for a cheap and cheerful present for somebody, then something like this is absolutely perfect- there are loads of similar things in shops and online that are all way more expensive (I'm talking from experience here having bought a similar noticeboard from Sass and Belle a year or so ago and as much as I love it, I am now wishing I'd just made my own).  


If you want to make one yourself all you need is: 

1 large photo frame/canvas
wadding (enough for a double layer if you're working with a chunky frame like ours from Ikea)
fabric (half a metre should be plenty for a similar sized frame to this one)
between 3/4 metres of ribbon
a staple gun

If you're using a frame, just remove the glass pane and then use the backing board as your base. Cut the wadding to the same size as the board/ canvas, using one or two layers depending on how thick your wadding is (tip: make sure you can still close the frame behind all the extra padding!). 

Then take your fabric and fit it around your base/canvas so you can then staple the edges of the material to the back of your base, making sure you pull the fabric tight so it fits snug against the wadding and doesn't hang loose.

Once you've secured the fabric to the board, work out where you want your criss crosses of ribbon to go, then cut each strip to size and staple the ends to the back of the board. Again, its really important to make sure these are nice and tight, otherwise you'll have trouble keeping your photos and notes in place.

If you're using a canvas, at you're all done and dusted now, if you use a frame like we did you now just need to pop it all back into place and secure the board into the frame. 

Then fix to your wall, take a step back and admire the pretty noticeboard you've just created!

It really is incredibly simple, we managed to complete ours in the time it took for this lemon drizzle cake to bake.


Tuesday, 18 December 2012

Are you hanging up your stocking on the wall?

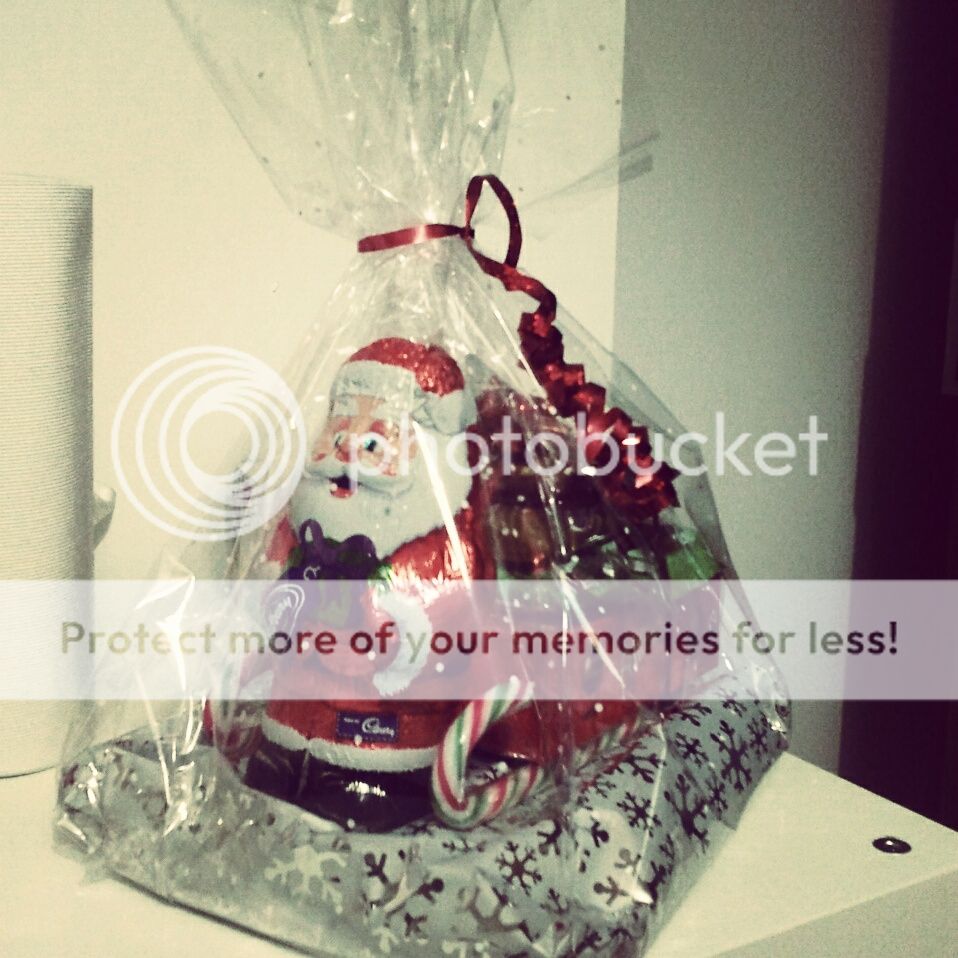
My friends literally amaze me. Take one of my old friends from school for example. We set a £5 limit for Christmas presents this year to save a few pennies and give ourselves a bit of a challenge to see what we could actually come up with on such a small budget (A fiver really doesn't go very far these days it seems...). And voila, this is what £5 can get you if you think a little creatively. 


Such a simple idea spending £5 on chocolate but I know I'd never in a million years have thought to present it like this! If you're stuck for last minute ideas for a Secret Santa present or just are looking for a little stocking filler for somebody then give it a go and try your hand at one of these. Grab a selection box, a couple of candy canes, a jolly looking santa and some other delicious bits and bobs and you're sorted! I'd been adamant that I was going to make one for whoever I pulled out of the hat for Secret Santa in work, and then I pulled out the one person who doesn't like sweets and chocolate (crazy woman...) so had to go back to the drawing board on that one. 

I was given this back at the start of December and I'd been showing incredible willpower not digging into it all, instead just making full use of it as a cute little Christmas decoration. It lasted until I got back from my work Christmas dinner the other day when for some inexplicable reason I decided that a three course meal hadn't quite filled me up and so I NEEDED to munch on a box of Malteasers afterwards.