http://sunshine--days.blogspot.co.uk/search/label/craftsHTML Map
Showing posts with label Christmas presents. Show all posts

Monday, 23 December 2013

He's put a great big smile on somebody's face


 Hopefully by now your Christmas shopping is all done and dusted, wrapped and sitting smugly under your Christmas tree. But if you're a bit stuck, or just looking for something else to make a present that little bit extra special then I might just be able to help you. These little cookie mix jars are really easy to make (if I can do it, anyone can!) and you should be able to find everything you need in the supermarket without too much difficulty. I gave these little beauties to two of my friends yesterday when we met up for our annual Christmas food and film day and they were the perfect present for our £5 price limit (it seems to be a recurring price limit for me this year!). 


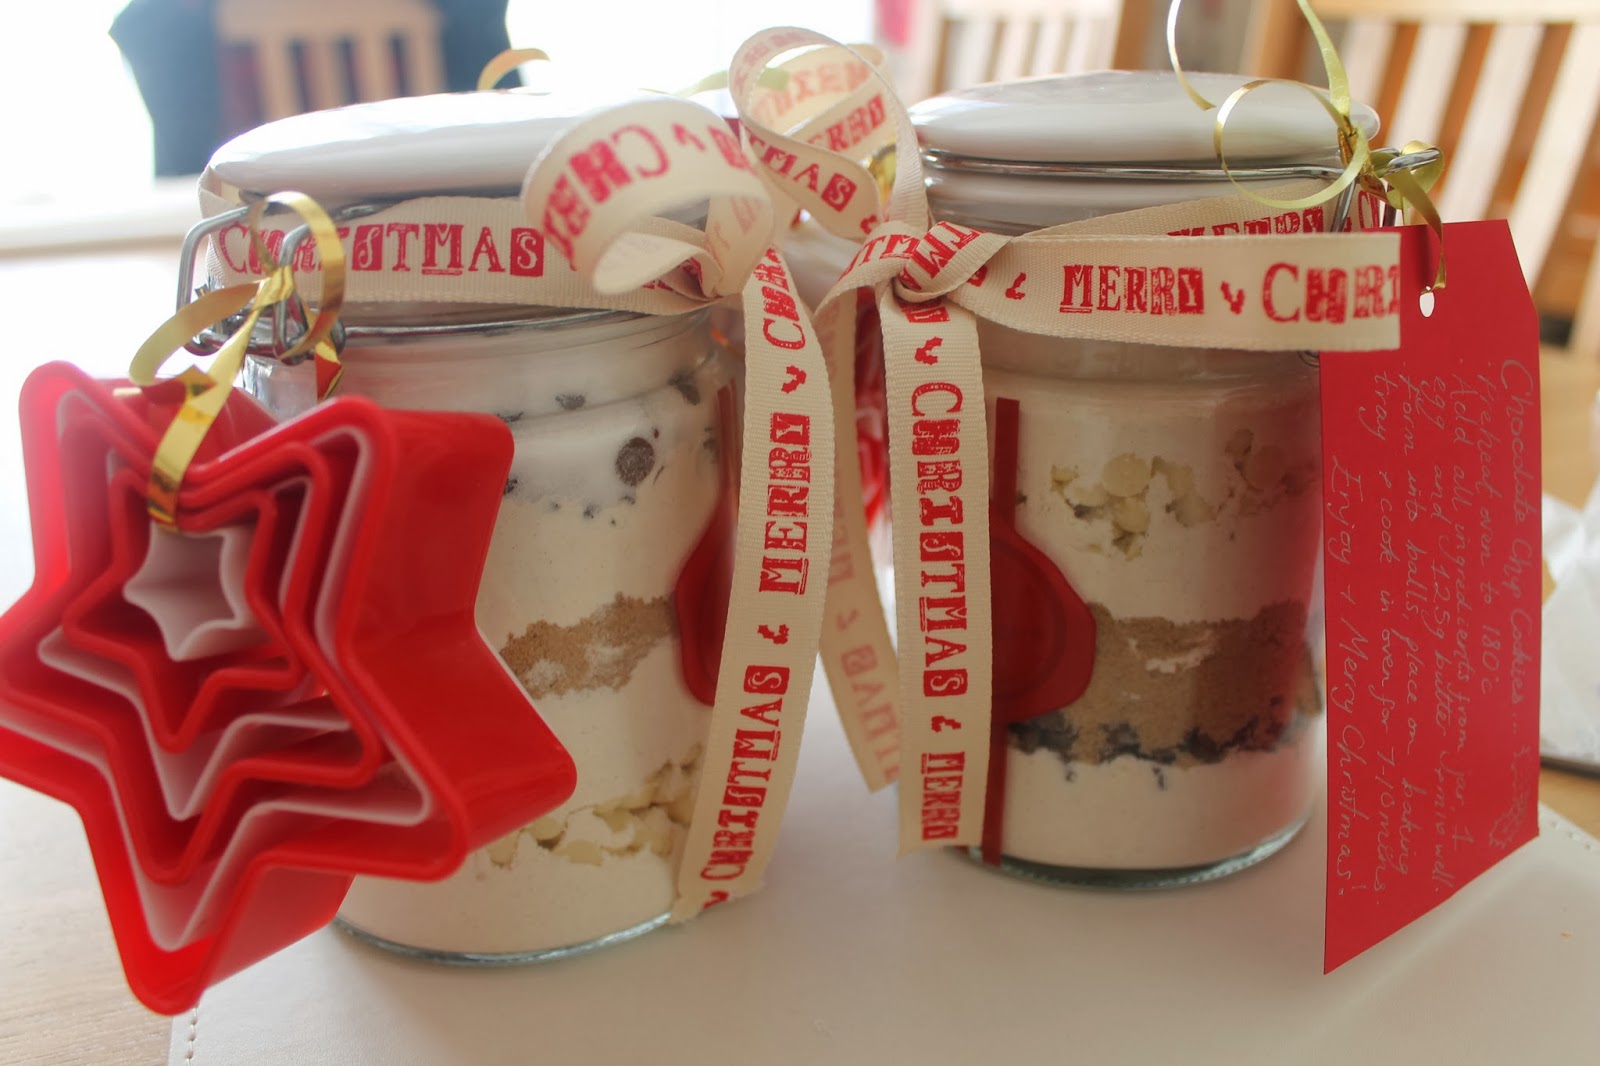
The actual cookie mixture inside the jars didn't go in as neatly as it could have done, but I figured it was ok as it just proves I made them myself! Cleverly, I read some tips on making recipe jars after filling my own up and they suggested starting with the finest ingredients at the bottom of the jar and then putting any chocolate chips or similarly 'gappy' items at the top- as you can see, the sugar escaped through the gaps in between my chocolate chips, making the layers a bit messier and less defined. But the jars (which I found in Clas Ohlsen- definitely an extra bonus finding Christmassy jars when I was just on a hunt for plain ones!) and the ribbon hopefully made up for the way things were looking inside the jars!

I got the cookie cutters from Home Bargains, I found two separate packs, one white and one red, and decided to mix the colours up to jazz things up a little bit. 


If you fancy making one of these yourself, the recipe inside the jar was as follows:

125g caster sugar
100g soft light brown sugar
225g self raising flour
100g white chocolate chips
100g milk chocolate chips

For the label, you need to write instructions along the lines of:

Preheat oven to 180C
Add all ingredients from the jar, 1 egg and 125g butter to a bowl and mix well until all is combined
Form the mixture into small, slightly flattened balls and place on a baking tray
Bake in the oven for 7-10 minutes

Let me know if you give these a try! They're a great present all year round and you can fill them up with all sorts of different ingredients (my friend made me a brownie jar for my birthday earlier this year).


Monday, 16 December 2013

Come now sing with me, Proper Crimbo!

My housemates and I had our Christmas dinner together at the end of last week. We decided to be incredibly lazy and go out for food rather than make it ourselves as there wasn't a time during a weekend when we'd all be here together during December and quite frankly I'm not sure who can be bothered to cook a roast with all the trimmings after a long day at work! Instead, we ended up in Wetherspoons, and considering I only spent just over a tenner I managed to stuff myself full with two courses plus a big glass of wine! The perfect arrangement really! 

We decided that house Christmas would be the perfect opportunity to swap our Secret Santa presents (although if you've ever managed to keep Secret Santa a secret when there's only three people involved you clearly haven't thought hard enough about the logic behind it!). Our limit was only £5, and I had loads of ideas for presents, but very few ideas that wouldn't break the budget. I ended up having a crafty brainwave and nipped to Leeds Markets for some pretty fabric to set me on my way with making some pictures for my friend's wall. I thought I'd share my idea with you as its incredibly simple and a great way to give somebody a pretty little personalised present without too much trouble! 


To make some similar wall art then all you need to do is follow these few instructions and you'll have a present sorted in no time!

You will need:
Two patterns of fabric (I bought 1/2 a metre of each but you actually only need about 1/4m really!)
Two canvases (I used these mega cheap canvases from Wilkinson's because I knew I could cover up the picture!)
Pinking Shears
Scissors,
Wall staple gun (working in education means I have pretty easy access to these, if you're not as lucky, super glue would do the trick too!)
Super Glue
Letter templates

Instructions:
Measure your fabric out around the canvases you are covering, making sure you have enough to cover the sides properly.

Staple/glue the fabric to the canvas.

Print off a template of the letters you'd like to use on the canvas- I made mine to fill an A4 Word Document.

Pin the template to the fabric and cut out the letters using the pinking shears.

Glue the letters onto the canvas.

Seriously, its that simple! What are you waiting for?

Let me know if you give it a try yourself!

(Not the most traditional of festive songs but its a great guilty pleasure!)